- AppliancesElectriciansHVACLandscapingLocksmithPest ControlPlumbingRenovationRoofingT V RepairAll Home Improvement
- Car AccidentClass ActionCorporate LawCriminal DefenseDivorce LawEmployment LawFamily LawFinancial LawLegal AidMedical Injury LawyersMedical MalpracticeReal Estate LawWater Fire RestorationAll Legal
- InvestmentRetirementAll Finance
- Animal InsuranceAutoGeneral InsuranceHealth PolicyHome RentersAll Insurance
- DentalHealth SpecialistsAll Medical
- Animal CareVeterinaryAll Pets
- Auto GlassTowingAll Automotive
How to Defrost Your Freezer

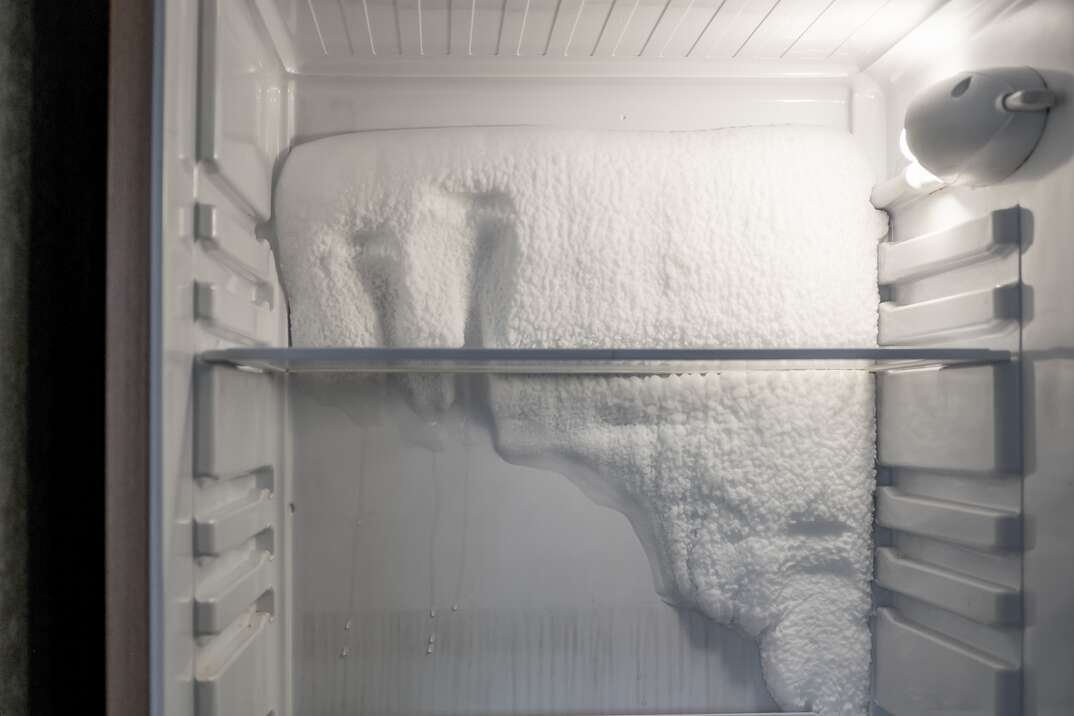
Does your frost-filled freezer look like an ice palace? Is your 1990 freezer missing a self-defrosting feature?
Whatever the reason for frost in your freezer, getting rid of it helps your freezer run more efficiently.
You'll need a place to store your food to keep it cold. It's helpful to have towels to soak up water as the ice melts. You can also use a wet-dry vacuum to suck up the water.
Other Things You’ll Need
- Fan
- Bowls
- Hot water
- Wooden spoon
- Hair dryer
You'll also need supplies to clean the freezer after you get rid of the ice. Grab clean microfiber cloths and a bowl of soapy water. Baking soda added to the cleaning mixture can help freshen the freezer. Then, follow these steps.
Step 1: Remove the Food
First thing to do is to remove the food from the refrigerator and freezer compartments. To get the ice to melt, you need to warm up the freezer to a temperature that's unsafe for food. Even if the food doesn't melt completely, it will thaw somewhat and could grow harmful bacteria.
If you have a spare refrigerator or chest freezer, move as much food to that appliance as possible. You can also use coolers with ice to keep the food cold. It's helpful to plan for defrosting the freezer so you can use up as much of your cold food as possible ahead of time.
Step 2: Unplug the Unit
If you leave your refrigerator running while you defrost it, you'll waste energy, and it will take longer. The fastest and most energy-efficient method is to unplug it and shut it off. Then, wait for the ice to melt. It can take a while, depending on how thick the ice is. Prop open the door to let warmer air inside. Place towels in the bottom of the freezer to soak up the water and keep it from running out on the floor.
Step 3: Speed Up the Melting
If you don’t want to wait, try these methods to speed up the melting:
- Direct a fan inside the freezer.
- Place a pan of boiling water in the freezer on top of a thick towel or potholder and swap out the hot water as it cools.
- Scrape ice gently off the walls with a wooden spoon as it starts to melt.
Step 4: Clean Out the Freezer
Having an empty refrigerator makes it easier to clean. Use warm, soapy water with a sprinkle of baking soda to wipe the interior walls of the freezer and refrigerator sections.
Step 5: Turn It Back on and Reload the Freezer
Plug in the refrigerator and let it cool to a safe temperature before placing the food back inside. Use a thermometer to check the temperature.
More Related Articles:
- How Much Does Appliance Repair Cost?
- Should I Get the Extended Warranty When I’m Buying an Appliance?
- Scratch-and-Dent Appliances: What to Know Before You Buy
- Why Does My Dishwasher Smell?
- My Washing Machine Won’t Drain! Here are 3 Ways to Fix It
How Do You Defrost a Chest Freezer?
Defrosting a chest freezer is similar to defrosting a refrigerator freezer. However, you might have a lot more frozen items to remove. Grab towels, cleaning products and tools to speed up the melting – just as you would for a refrigerator freezer. Then, jump into the steps for how to defrost freezer chests.
Step 1: Prep the Freezer
Empty the chest freezer, moving as much food to your refrigerator freezer as possible. The rest can go in coolers with ice. Line the bottom of the chest freezer with towels if you want. Because the chest freezer keeps the water contained, you can also wait and suck it up with a wet-dry vacuum. Unplug the freezer and prop the lid open.
Step 2: Speed Up the Process
You can use similar methods as the refrigerator freezer to speed up the process. A stand fan is easier to direct inside the freezer than a box fan. You can also use a hair dryer or scrape the melting ice with a wooden spoon.
Step 3: Clean It Up
When all the ice is melted, grab your cleaning solution of warm, soapy water and baking soda. Use caution when cleaning the bottom, which may be difficult to reach. Dry the walls before plugging in the chest freezer. Let it reach its coldest temperature. Then, fill it back up with your food.
Elocal Editorial Content is for educational and entertainment purposes only. Editorial Content should not be used as a substitute for advice from a licensed professional in your state reviewing your issue. Systems, equipment, issues and circumstances vary. Follow the manufacturer's safety precautions. The opinions, beliefs and viewpoints expressed by the eLocal Editorial Team and other third-party content providers do not necessarily reflect the opinions, beliefs and viewpoints of eLocal or its affiliate companies. Use of the Blog is subject to the
Website Terms and Conditions.The eLocal Editorial Team operates independently of eLocal USA's marketing and sales decisions.

