
Can You Paint Tile? 7 Steps to This DIY Project
Dreading the hassle and cost of replacing old, tired-looking tiles? We all know it can be a significant expense and a messy, labor-intensive endeavor. (And disposing of old tiles can create a substantial amount of waste, which doesn’t align with environmentally conscious ideals.)
Read More Home Improvement Articles
We’ve got a solution: Paint your existing tiles.
What Type of Tiles Can You Paint?
You can paint a variety of types of tiles, but the process may vary slightly depending on the material. Types of tiles that can be painted include:
- Ceramic: These are the most commonly painted tiles, thanks to their smooth surface and durability. Ceramic tiles are often found in bathrooms, kitchens and tile floors.
- Porcelain: Similar to ceramic tiles, porcelain tiles can also be painted. They are denser and more resistant to moisture, but the painting process is essentially the same.
- Stone: Stone tiles such as marble, granite or slate can also be painted, although it's less common due to the natural beauty of the stone. Painting stone tiles requires a bit more preparation, as the surface is typically rougher and more porous than ceramic or porcelain.
- Glass: It's possible to paint glass tiles, but the process is a bit more complex. Special types of paint and primers designed to adhere to slick surfaces are necessary.
Note: Not all tiles should be painted. For example, it's usually not recommended to paint shower tiles or any tiles that are frequently exposed to water or heavy wear, as the paint can chip or peel over time. Always consider the location and usage of your tiles before deciding to paint them.


Certain types of tile paint are more suitable due to their durability and adherence properties. Options include:
One-Part Epoxy
This paint is made to adhere to tile and is extremely durable and washable. It's often used for painting floors and other high-traffic areas. It dries to a hard finish and is resistant to staining, making it an excellent choice for areas like bathrooms or kitchens.
Two-Part Epoxy
As the name implies, two-part epoxy consists of two parts: a base and an activator. These are mixed together before application. It's extremely durable and resistant to damage from water and chemicals, making it suitable for bathrooms and kitchens.
Enamel
Enamel paints, especially oil-based enamel, can be used for painting tiles. They provide a hard, glossy finish that's resistant to moisture and wear. However, they can be trickier to work with than water-based paints and require mineral spirits for cleanup.
Specialty Tile Paints
Some manufacturers offer paint specifically designed for tiles. These paints adhere well to ceramic and porcelain surfaces and offer durable, moisture-resistant finishes.
Keep Primer in Mind, Too
Regardless of the type of paint you use, it's important to use a high-adhesion primer designed to stick to surfaces like ceramic or porcelain. A bonding primer is often recommended because it's specifically designed to adhere to slick surfaces that paint might otherwise have difficulty sticking to.
One example is a latex-based bonding primer. This type of primer adheres well to glossy surfaces like tile, and it's water-based, so it's easy to clean up. It also tends to have less odor than oil-based primers, which can be a significant advantage when working indoors.
How to Paint Tiles: Step by Step
Things You’ll Need:
- Drop cloth or painter’s plastic
- Painter’s tape
- Commercial cleaner
- Degreasing cleaner (for kitchens)
- Sponge
- Ceramic tile caulk, caulk gun and putty knife (if necessary)
- Chisel, hammer, replacement tile, tile adhesive and grout (if necessary)
- Dust mask or respirator
- Sanding block or random orbital sander
- 100- to 220-grit sandpaper
- Bonding primer
- Paint tray
- Paint roller
- Paintbrush
- Urethane sealer (optional)
Step 1: Prepare the Area
Protect surrounding surfaces from accidental spills, splatters or overpainting by covering them with drop cloths or painter’s plastic. You can protect trim, baseboard and the corners of adjacent walls or floors with painter’s tape.
Step 2: Clean the Tiles
Before you can start painting, you'll need to thoroughly clean your tiles. Dirt, grease or soap scum can prevent paint from adhering properly, leading to peeling or flaking over time. Use a commercial cleaner and a sponge to scrub each tile, then rinse with clear water. In the kitchen, a degreasing cleaner might be necessary to remove stubborn grime. Once cleaned, allow your tiles to dry fully — typically between 24 to 48 hours.
More Related Articles:
- How Much Does a Home Inspection Cost?
- 4 Tips for Hiring a General Contractor for Your Next Remodeling Project
- Should You Hire a Contractor or a Handyman?
- 5 Things to Look For When You're Hiring an Electrician
- What to Look for When Hiring an Exterminator
Step 3: (Optional) Repair or Replace Tiles
For small chips and cracks, apply a thin layer of ceramic tile caulk with a putty knife. Smooth the caulk so it's level with the tile surface, then scrape away any excess. Let the caulk dry according to the manufacturer's instructions.
If a tile is severely damaged, it may be best to replace it before proceeding with the painting process. Carefully remove the damaged tile and any remaining adhesive with a chisel and hammer. Apply a fresh layer of tile adhesive, press the new tile into place and allow it to set. Once set, re-grout the tile.
Allow all repairs to dry completely. This may take a few hours to a few days, depending on the extent of the repairs and the products used.
Step 4: Sand the Tiles
To help the paint adhere to the tile, you'll need to sand away the protective glaze that most tiles have. Sanding tiles can create a lot of dust, so put on a dust mask or respirator and open the windows before you get started.
Use a sanding block or random orbital sander equipped with 100- to 220-grit sandpaper to lightly sand the tiles using gentle, even pressure. The goal is not to remove the tile surface, but to roughen the glaze so that the paint can adhere. The tiles should have a slightly dull and rough texture after sanding. If you see any shiny or smooth spots, you may need to re-sand those areas.
Once you've sanded all the tiles, wipe them down with a damp cloth to remove any dust or debris.
Step 5: Prime the Tiles
Priming tiles not only hides unwanted colors and designs, but it also helps new paint adhere better to tiles. Stir the primer until it achieves a smooth and uniform consistency, then pour some into a paint tray. Dip a paint roller into the primer and roll it on the tray until the primer is evenly distributed on the roller.
Begin applying primer to the tiles in even, overlapping passes. Once you’ve covered the majority of the tile with the roller, use a brush for smaller areas and edges. Make sure to cover the entire tile surface, including the grout lines.
Allow the primer to dry completely according to the manufacturer's instructions, usually around 24 hours.
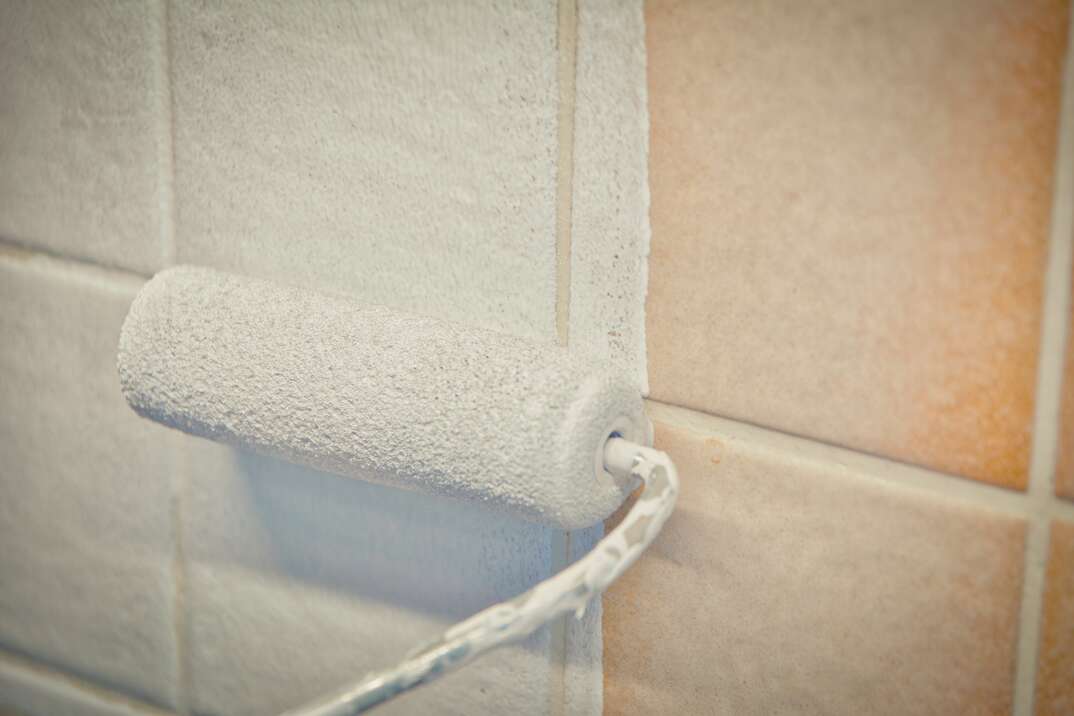
Step 6: Paint the Tiles
Apply the paint in the same way you did the primer, using a roller for large areas and a brush for smaller areas and edges and making sure to cover the entire surface.
Let the first coat of paint dry according to the manufacturer's instructions. It's important to wait for the suggested drying time to prevent smearing or smudging the paint. After the first coat is completely dry, apply a second coat of paint. The second coat will ensure full coverage and a more uniform finish. Let this coat dry as well.
Depending on the color of the original tiles and the color of the paint you're using, you may need to apply additional coats of paint for full coverage. Continue adding paint coats until you achieve the desired look, letting each coat dry thoroughly before applying the next.
Allow the painted tiles to cure for a few days before exposing them to moisture or heavy use.
Step 7: (Optional) Apply Sealer
If you want extra protection for your newly painted tiles, consider applying a clear, water-based urethane sealer. This can help guard against scratches and wear, maintaining the fresh look of your tiles for longer.
Apply the sealer using the same process you used for the primer and paint, ensuring you cover the entire surface of the tile. Allow the sealer to dry according to the manufacturer's instructions. Once dry, you can apply a second coat if necessary for added protection. Some products recommend applying multiple coats for best results. Always allow each coat to dry fully before applying the next one.
After the final coat, let the sealer cure as per the manufacturer's recommendation before using the area. The curing time can vary, but it is typically 24 to 72 hours.
Elocal Editorial Content is for educational and entertainment purposes only. Editorial Content should not be used as a substitute for advice from a licensed professional in your state reviewing your issue. Systems, equipment, issues and circumstances vary. Follow the manufacturer's safety precautions. The opinions, beliefs and viewpoints expressed by the eLocal Editorial Team and other third-party content providers do not necessarily reflect the opinions, beliefs and viewpoints of eLocal or its affiliate companies. Use of the Blog is subject to the
Website Terms and Conditions.The eLocal Editorial Team operates independently of eLocal USA's marketing and sales decisions.